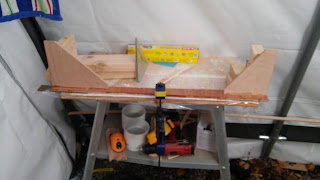
I'm writing this blog as a journal of my build of a Duo-660 catamaran. Most of the content will be dedicated to this endeavor. I try to populate posts with pictures since it is instructive. The notes tab is for misfit posts. Always nice to have a place for the misfits.

-Esteban

Sunday, January 31, 2016

Sneaking Out to the Boat Shed with a Fein

Tubing with the kids was fun. And it turns out that running kids up and down a snowy mountain slope for hours has the effect of tiring them out. So when we got home and everyone rested, I snuck out to visit my boat.

I used the Fein tool to trim the chines and stringers and cut small corners at reliefs in bulkheads to get the chines to lie fair.  The picture below is kind of an overall shot of the bow. Had to use the flash since it was getting late and the shop light is at the other end of the shed.

  
Below shows where the chines were cut to meet the stem. I'm really happy with the Fein tool.  Making these cuts was easy, especially when compared with trying to use a hacksaw or Dremel to do the same job.


This last pic shows where the stringers terminate into the chine. I think the flash makes my cut look better than it really is (a few small gaps). That said, I'm confident the imperfections are well within the capability of filled epoxy.


It's all set up in the shop and ready to epoxy. I ran out of time tonight to start gluing. I may not have glued today anyway, since a night of thinking through the order of gluing will be a good thing. I want to have a pretty solid plan before I start bonding around 20 individual joints.

Saturday, January 30, 2016

Fein Tool Arrived Early and I'm Not Happy

I've never been so down to get good news. The Fein tool arrived today, a full 5 days ahead of time. Which under normal circumstances would make me very happy. The problem is that we have our Nephew visiting and we are busy showing him a good time around Seattle. Before it was easy to stay out of the boat shed because I lacked the required tools anyway. But now I have the tools but will still not be able to work on the boat. just another episode of me trying to build a boat and still keep my priorities straight. I'm not terribly religious but this reminds me of St. Augustine who said something to the effect that we have pain (and sin) in our lives because we get our loves out of order.  I'll think about that on our way to go sledding with the family tomorrow.  Here is the pic of this very cool tool.


Wednesday, January 27, 2016

Chines Fully Bent

My plan is working! At least so far. It stopped raining for most of the day and I made the most of it.  I built my hold down frames for the chines at the bow and got the chines bent to where they need to be.  Here are the pictures, first one showing the frame with the chines pinned under them and temporary spacers where the stringer will eventually go.


I tried to get a picture here that shows the bend in the chine.


And as much of a wide angle shot as I can get in the boat shed.


Also cut scarfs for the shears but still have to do the gluing.  Next step is to cut the front of chines off at the stem, but I might wait for the Fein tool to arrive.  I have to wait for the tool to finish anyway and having it will help me to do a better job with less chance of screwing up.

Revised Plan

Here is the revised plan:

1: Build a frame (triangular) anchored to the rails, that is in position to hold the chine down at the stem but does not touch the stem (1 or 2 inches away).

2: Hook chines under frame and lower (clamp) onto bulkheads.
    Will need spacers to act as stringers on BH1 for this step

3: Cut off forward end of chines at stem

4: Dry run clamping scheme at bow

5: Fabricate breasthook to tie chines together in transverse direction

5: Mark and cut stringer termination into chines (need fein tool)

6: Disassemble

7: Reassemble with epoxy (filled with fumed silica) including breasthook.

The breasthook is a key piece of this puzzle since it limits the degrees of freedom the chines have to rotate about BH1. They should stay put when the frame is removed.  Only after all of this is done will I attach the stem. This is so if anything shifts I can fair it back to acceptable before committing the stem.

I'm waiting the fein tool so will get as far as I can on this and build up the shear timbers while I anxiously await its arrival.

Monday, January 25, 2016

Chines Bent!

My responsibilities caught up with me today, but I did sneak out to the boat shed for a bit.  I got the chines bent to where they need to be (mostly).  First a couple of pretty pictures:


Now a picture of where things get a little more complex.  I need to bring all of these together at the stem, or in the case of the stringers cut them and fair them into the chines.


One more thing I did manage was to measure the angle at which the chines will hit the stem (80 degrees). In the picture below I was not pushing down on the stem to hit its mark (I just took this to show how I made the measurement). For the real measurement I did not have a hand free to hold the camera.


Pondering next steps: I think the important features here are the stringers that terminate into the chines. I think those hold the chines down. If I bent the chines now and attached them to the stem they would just drag the stem up off the rails. I was pushing very hard. This of course throws a wrench in my plan. Gives me something to think about tonight I suppose.

Sunday, January 24, 2016

Planning Chine Installation

I'm still pondering how bend the chines onto the frame. Specifically I'm worried about how to cut in the angle on the chines where they meet the stem. Simultaneously I need to cut in the stringer where it terminates into the chine.  Kind of a chicken and egg issue since the position of one affects the other.

Here is the process I"m thinking about:

1: Cut notches in higher bend areas of both chines (notches to match)

2: Clamp the chines into the top of the chine stringer relief in bulkhead 1

3: Support the aft ends of the chines high enough to so that the forward end of the chines hit their dimension on the stem. (not sure this step will work).

4: Cut in the indicated angle on the chines at the stem. (see tool order)

5: Make superstucture pieces to indicated angle (to hold chine down)

6: Cut stringers to match indicated chine interface (see tool order)

7: Bond Stem superstructure in place (with chines removed), allow cure.

8: Push Stringer and Chines into place on BH1 and stem

9: Practice bend everything into place (small prayer here for it not to break)

10: If that works repeat with epoxy.

Tool Order. I went ahead and ordered a Fein multitool. I have been mulling this purchase over for some time. I knew I would need something like this when it comes time to match-trim planking.  I could probably get away with trimming the chines with a hacksaw or dremel. But doing the long fine cut on the stringer (where it interfaces with the chine) will be much easier with the Fein tool. The downside is that I will not arrive until Feb 4.  I'll be thinking about re-doing the order above to get as much done before needing the Fein tool as possible. I will probably also scarf together the shear timbers while I wait for the tool to arrive.

BTW: I paid $294 on Amazon and got the newest model (350Q) that comes in a hard plastic case with a healthy assortment of blades/attachments.


2nd Scarf Done

I took yesterday off from boat work, (not intentionally). Outing with the family just took awhile and then we had company in the evening. The upside is that I got the incomparable Bob Burt to look over the my progress.  Here is a picture of the second scarfing set up for curing.


Saturday, January 23, 2016

Scarfing Chines

I cut the 4 joints I need to make the chines. This time I did it using a 10:1 ratio (hitting the middle of Bryan's recommended 8 - 12).  To make the scarf I clamped both pieces of stock together and offset appropriately. Then cut straight across both using the track saw.  As shown below (luckily we got a break from the rain yesterday).


I numbered the joints so that as they get glued up each side will only be married up to its match cut. Here is a picture of the glued up joint.


2 joints glued yesterday, will do 2 today, and tomorrow I will start fiddling with installation.

Thursday, January 21, 2016

Screwing Things Up In the Pacific Northwest

So I got two of the loose stringers corralled and put butt straps over their shallow scarfs.  The other two have to wait until I have the chines installed because they actually terminate into the chines.

With all that done I thought I had a decent day. Then I noticed that BH1 and BH2 are backwards.  At this point there is not much to do about it except to prepare for more scarfing and filling than should have been needed. I'm really very disappointed in myself.  I think in the end I will still get a hull out of this but I'm starting to accumulate band-aids.

Here a are a couple of pictures.


If you look closely you can see the laser lighting up the alignment holes, at least that went right.

Besides being upset with myself what is occupying my thoughts is that I have no idea how to cut the angled and tapering edge to the keel at the forward end near the bow.  It does not have a stringer or chine at its edge from which to make a match cut.  I will try to put that out of my mind for now so I can continue work on the chines.  Next steps will be to notch them in a transverse direction so they can bend easier and to scarf them to length.  This is going to require a trip to the lumber store and some preparation work, so it may be awhile before I can get back to adding parts to the boat.

Wednesday, January 20, 2016

Feeding the Addiction

I set out to accomplish 3 things today and actually did all three. (Amazing).


Item 1:
Bryan Cox of Duo 480 fame (see his blog in my links section). Pointed out to me that I jacked up my stringer scarfs by not cutting the angle drastically smaller.   It's too late for these stringers but I did go back and put on some butt straps to shore up the joints.  The stringers look fair in the way they took the bend to the hull (no sharp turn at the joint), so I think this will be sufficient.


Item 2:
I cut and mounted the top and bottom gussets onto bulkhead 0. I'm still a little hazy on how the stem needs to come together but I will spend some time tonight staring at drawings and pictures of other efforts on the internet.


Item 3:
I repaired the forward stringer joints.  I was going to try to change the angle on the scarfs by taking a jig saw to the protruding stringer ends. But the thought of trying to cut a straight cut on a cantilevered stringer end just seems like an invitation for disaster. So I kept the shallow angle and will put butt straps on these joints as well (after the stringer is installed on the bulkheads).

Going forward I think I may have more fabrication work to do on the stem before I can really button all of this up and move on to installing chines, and shear timbers. I will be thinking of specific next steps as I go over drawings tonight.

Tuesday, January 19, 2016

When To Admit An Addiction

I blew off all my responsibilities today to work on my boat. I seem to recall that this is one of the warning signs of addiction. I'll try to look up the other warning signs, if I'm not too busy working on the boat.  I re-aligned the forward bulkheads and set up a support for bulkhead 0 (stem).


After spending some time with the drawings to see how the bow is supposed to come together I realize I have some fabrication work to do on BH0. It needs some gussets attached.  So in addition to getting reacquainted with the drawings, I hatched a plan for the next steps. Day 1 I will be doing the fab work on BH0 and repairing my broken stringer scarf joints. Day 2 will be attaching the stringers all the way to BH0.  That is the optimist in me talking, but it seems reasonable at the moment.

Monday, January 18, 2016

Stingers Installed! kind of....

I went out to install stringers today and promptly broke each stringer at its forward scarf.  It is just too long for one person to handle without overly stressing the joints.  I thought about repairing the stringers and then trying again. But I don't see why it would not just happen again.  So I proceeded with the installation but made some allowance for fixing the angle problem that I could run into due to not using a full length stringer (more on that later).  With all that covered here are the pictures.


Clamps wrapped in cellophane and ready to go.


Stingers (forward ends supported on clamps) waiting installation.


Done!


Since I was working with short stringers I clamped the stringers inboard to align them to the next bulkhead.


Stringer installation on aft part of boat.

I have to admit I'm feeling pretty good. Today I'll be thinking about next steps, especially how to set up and attach Bulkhead 0. 
 

Sunday, January 17, 2016

Bernd Saves Me from Myself

So Bernd responded to my question about how to proceed with getting the stringers onto the bulkheads on the K-Design user group.  Of course I was going to do it the wrong way. He said to make the stingers long enough first and then put them on. So that is what I'm doing. Its raining pretty steadily here, and space always tight, is really at a premium now that the bulkheads are set up. So I used the bulkheads as stands to hold up the stingers while I scarfed them together.


I'm really not impressed with my scarfing job hopefully it will work out ok one I start putting these on the bulkheads.


I'll let these cure tonight and hopefully will be able to start installing them tomorrow.

Friday, January 15, 2016

Bulkhead Alignment Complete

Alignment done but conundrums abound.

It wasn't that much work to finish the alignment today. Good thing because I didn't have a lot of time to devote to the boat. Here is a picture of the aft three bulkheads.


I test fit some stringers into the bulkheads and have to admit that the fit is harder than I would like. What I did not anticipate is that the relative position of the stringers between bulkheads puts the stringers in a twist. Which means they are wider in cross section than allowed for by the reliefs in the bulkheads. I think the right amount of "negotiation" will get the stringer properly seated, its just not as simple as it may appear.  I bought some course grit sandpaper and will be sanding off the corners of at the implicated parts of the stringers to try to make this easier.

The other conundrum is whether to first glue up the stringer to full boat length before installing. Or to build up the stinger lengthwise as I progress from the transom to the bow with the stringers installed as I go. I asked for advise on the k-designs website because I can see pros and cons to either approach. And the pictures I can find online only show completed installations.

Having a stringer of proper length seems right, but I don't know how I could epoxy bond at least 3 sections of stringer and keep it straight over its entire length. The downside of the built as you go approach is that I think the angle of the stringer to bulkhead joint will be a little off if the leading edge of the stringer is not pulled into a direction to meet the next bulkhead.

I think I will build up stringers as I go, but I will lag the bond by one bulkhead. So if the stringer reaches from the transom to past BH 5 I will only bond at the transom and BH6. Leaving the stringer just out of its relief on BH5 (to preserve my access to apply epoxy in the next step).  What I saw doing test fits today is that the stringer really wants to go wide of the hull and I don't want to bond any stringer at an angle that wide of the mark. Just seems like it will unduly stress the bonded joint and should be avoided.

To aid in this process I also bought two very large clamps to hold the front edges of the stringers at an angle that is at least close to correct. I will be sure to post pictures of to make this more clear.

Lastly, this weekend is another football intense weekend with the Seahawks facing a very good North Carolina team.  I have to enjoy it now because soon football season will be over and lets face facts; baseball and basketball are poor substitutes.

Sleepless Update on Bulkhead Alignment

I got out to the boat shed today and it was quite a day:

So my last post is from a mistake or two ago so I will try to recap this adventure.  A quick look at the drawings would have revealed that BH4 is the tallest. So that mistake is just down to me not having the patience to do what I knew I should. My next mistake was a little more nuanced. Fresh from discovering the hard way that BH4 is the tallest. I set up the laser forward of BH 4 and aimed it facing backward toward the transom. I then lined up BH5-7 to that laser line and felt good about my progress.  Then I moved the laser behind BH5 and aimed it forward through BH4 toward the bow.  I figured that BH4 and BH5 are determining my line so all should be well. Then I put BH1 in its location and found this.


On this picture you can just see the alignment hole about an inch higher than the laser spot. I cannot adjust the position of the bulkheads lower than the rails. So I took this opportunity to curse profusely. Somehow cursing makes me feel better. Once I gathered my composure I figured out how I messed this up.  I was setting up my laser fairly casually since I figured the actual line was defined by the alignment holes in the bulkheads themselves.  The problem is that the bulkheads are thin. Here is a figure that will explain my screw-up.


I exaggerated the figure but you get the idea.  To fix this I set up the laser as shown below


Which is also where I am now, BH1-5 area all set up. I just need to turn the laser around and re-adjust BH6 and BH7. Here is a pic of the forward bulkheads lined up.


Two pieces of good news are that BH6 and BH7 are shorter so I shouldn't run into the rails again, and I'm becoming adept at setting up and taking down bulkheads. I should finish the alignment tomorrow and will start thinking about stringer installation next.

Monday, January 11, 2016

Back To Work

I took the weekend to watch NFL playoffs. The Seahawks got lucky against Minnesota, but I will take a lucky win over an unlucky loss any day.

I invested in a laser level and I don't know how I would do this job without it. Even with the laser this is still no easy task. I'll give the good news first, and then discuss my continued learning.  Here is the picture showing Bulkheads 5, 6, and 7 (transom) all lined up and looking pretty.


Now here is a picture of where the laser hits when I add in BH4.


I had figured (from eyesight) that bulkhead 5 was the tallest, so if I started from there I could adjust all the other bulkheads up (away from the rails) to lined them up.  The picture above is where the laser hits on BH5 from BH4. So now I have to go back and move 5, 6, and 7 up to meet the BH 4 line. I'm a bit bummed by this, but it is another example of me just trying to get it done quick without taking the time to think things through.

I will see if I can spend a bit of time with the drawings tonight to make sure that BH4 is the highest in this regard so I don't repeat my mistake.

Friday, January 8, 2016

Bulkhead Alignment: Going Slow

Started aligning bulkheads today. I thought this would be tedious and I was right. I gave up on having a transom with no holes as I quickly decided I needed a reliable way to anchor my line I thought would help in aligning the bulkheads. I built up a frame for the transom and then aligned BH6 to that. It took a bit too long to get BH6 plumb and level. I just started on BH5 but can't see the mark on the transom through the alignment holes (lower set) so I don't know which way to move the bulkhead.  I'm going to get a laser pointer to see if I can figure it out that way.  I think the crux of the difficulty besides building in a shed that is sitting on gravel is that you need to simultaneously move things and have them stay put. Here is a picture, I was shining my light on the transom to try to see if it helped my ability to see the lower alignment hole.


Thursday, January 7, 2016

Bulkheads Stood Up

Got the bulkheads stood up on the rails today. I located small cleats at the proper locations on the rails to hold up each bulkhead. Bulkheads 6 and 7 are going to require some bracketry work to get them in position. The others should be just require shims (I hope). Aligning these is not going to be easy.  Tonight I will be re-reading the manual and thinking through how to approach doing the alignment. Tomorrow will see me buying some more small clamps and starting the process.


It is nice to see things stood up , and it gives a good feel for how big this boat is going to be.

Wednesday, January 6, 2016

Ama Rails and Concrete

I got the footers for the ama rails concreted in today. It wasn't that much work, at least it wasn't raining.  I'm going to use these rails as a floor to build the ama from since I don't have a real floor in the driveway.  I should get some time tomorrow to actually stand up some bulkheads.  I know its a long way to go yet, but at least then it will look like something.


Monday, January 4, 2016

Back from Peru. and Sheet Epoxy Done

Been back from Peru for a few days and finally got back out to the boat shed. I had one application on one sheet left to do on the planking plywood. Which I got done today.  It was nice and warm in Peru and its just cold enough to be uncomfortable in Seattle.  I'm going to keep pushing on though because once the warm weather arrives there will be other distractions. Not least of which is sailing.