

The Searchlight
Friday, December 11, 2015
Boat and a Ukulele, Cliche?....Perhaps, but OK with me
I've got a three week hiatus on my hands to take a 3 week vacation in Peru. I'm going to use some of that downtime to learn to play a Ukulele. I know it's a bit hackneyed but who really cares. As far as I can tell I have only a very small or totally absent talent for music (I've tried and essentially failed at the saxophone and mandolin already). But that trifle has not deterred my desire to play. So here is the Uke I just got, I went for the concert Fluke.

Thursday, December 10, 2015
Ama Planking Epoxy Chore Continues
I've finished 3 and half sheets of 4 of my plywood epoxy application chore. It is raining constantly now, but with short periods of more intense rain. When it comes down hard inside the boat shed it sounds like God has come to take me away, and might be a little angry. I'm done for the day, but have to confess that I will be lucky to finish the last epoxy application before year-end. We are taking 3 week vacation to Peru. Hopefully I will find my way to a boat while we are there, if so I will post under "Sailing".
Tuesday, December 8, 2015
Doubling My Rate of Progress
So after a few days off from boat work, I got back to it today. I set things up so I could apply an epoxy coat to 2 sheets at once. Its no fun tip-toeing around two sheets of plywood in that small space, but its better than doing it for more days than necessary.


Amazing Disappearing Boat Shed Leak
I've been dealing with a bit of a mystery. Last week I thought my boat shed roof was leaking. I had a fairly even coating of water drops spread over most of the ceiling of the shed. I figured (hoped) that it was because the tent material wasn't pulled as tight as it could have been (my fault) and there were some areas of standing water on top of the shed. So yesterday I went out to remedially tighten the shed. Here is the mystery, despite almost constant rain over the last week, the shed ceiling was bone dry.
A couple of notes,
I did leave the heater on in there to assist in curing the epoxy on the first planking sheet. Also although wet it is much warmer this week. So now I think it wasn't leaking I was seeing, it was condensation. For now I left the heater on a low setting. Longer term I'm not sure how to address.
Also after tightening the tent it still had some areas at one end that could have standing water so I gave it a bit of a peak with a piece of furring strip to prevent any standing water on the roof.

Update: So this was condensation, I've been leaving the heater in the boat shed on at a low setting and problem is solved.
Thursday, December 3, 2015
Planking Preparation
I'm now cursed with having thought about this too much. As much as I would like to start setting up frames if I did that now I would not have space to epoxy coat the plywood sheets to be used for planking. So I'm coating the sheets now. This will take awhile 4 sheets (my guess) 2 coats, 1 day per coat.


Things That Make You Go Hmmmm
Putting the rudder jig away I found this when I turned it over:

I have no idea when this happened. Looks like it was caused by the reaction to a rudder compression force. The "V" shape of the jig trying to be pushed open. If I do decide to make new rudders in the future, I will pick a better material for the jig.

I have no idea when this happened. Looks like it was caused by the reaction to a rudder compression force. The "V" shape of the jig trying to be pushed open. If I do decide to make new rudders in the future, I will pick a better material for the jig.
R4 Looking OK
Pulling R4 off its fences this is what I found.

I think this will work. The leading edge is a little messy but nothing that some sanding and a few applications of epoxy-filler paste won't fix.

I think this will work. The leading edge is a little messy but nothing that some sanding and a few applications of epoxy-filler paste won't fix.
Wednesday, December 2, 2015
Getting More Than I Thought
I've answered the question of how I chose the boat, and why I figured I needed to build it rather than buy a commercial boat. That said I feel like there is something missing in all of that. There is something else going on here that is compelling me to build this boat. It comes from deep and I know it's tied to the experience of sailing but, it's more, or at least different than sailing.
I should confess when not sailing, or boat building, I am reading or thinking about sailing or boatbuilding, that is not too much of an exaggeration. From what I can tell, I'm not unique in this regard. Its gets under your skin and into your bones.
I think that sailing is the starter drug. It requires thought and can be challenging, but is enjoyable and can be social. If you have taken the bait with sailing, then you may move onto boatbuilding. Again you are engaging in something that requires thought and it's rewarding in the small victories it offers. The common thread is that both are at some level about independence. There is no authority on your boat telling you how and when to do things, and in my shop I'm alone to figure things out. As I work on this boat I can feel myself gaining skills and growing in the extent to which I am comfortable relying on myself to do new things. Maybe the insight here is that self reliance is another name for freedom. So I am discovering freedom as I pursue the thing that I thought of as my conveyance to set myself free upon the water. The water. Needed for life and teeming with it, itself is dangerous, and I can't help but suspect that the freedom I seek is also dangerous.
I didn't expect to find so much about myself in building a boat. I thought I wanted a certain kind of boat and this was the best way to go about it. And I've only just begun.
Tuesday, December 1, 2015
Rudder Planning
Despite recent success with R4, I am not that happy with its shape. At least I wasn't until I compared it to the shape of the successful test rudder (TR2). The test rudder is too blunt at its leading edge, I think R4 is too fine. But the variation between my 3 successful rudder bends in a weird way makes me feel better about keeping R4. The thought being that maybe I could build 10 more rudders and still not get a shape that I like. So I'm going to keep R1 and R4 as my go-forward rudders for now. Its time to move on. I like the comment I got from Ed T. on a previous post, that if I feel strongly about it after I'm sailing, I will rebuild them then.
R4 Carbon Fiber Installation
I am very happy with how this went. Uncharacteristically for me I took some time and set things up carefully and deliberately. Here is a picture of laying out the strips of carbon fiber fabric.

And here is the ready to get started picture. Since I have the spar already epoxied in place I could do this part on the bench and it was nice to not have to be bent over the entire time as I was when doing this on R1 (it was in the jig).

I couldn't take in process pictures because I didn't want take the time to mess with glove replacement, or risk getting epoxy on my cell phone. The synopsis is that I took my time and made sure I had each layer well wetted out and well seated on the inside of the rudder faces. The only drama was on the 3rd layer where one side flopped over and wanted to make a mess. So I just jammed my gloved hand in there to get it seated correctly. It wasn't that easy to do with fingers, it would have been impossible with sticks or brushes. Here is the a picture of the profile as I left it.

Once again, I used almost every clamp I own to close this up.

Wednesday, November 25, 2015
Blood, Sweat, And......
Well I haven't cried......yet. Caught my own thumb in the clamp.
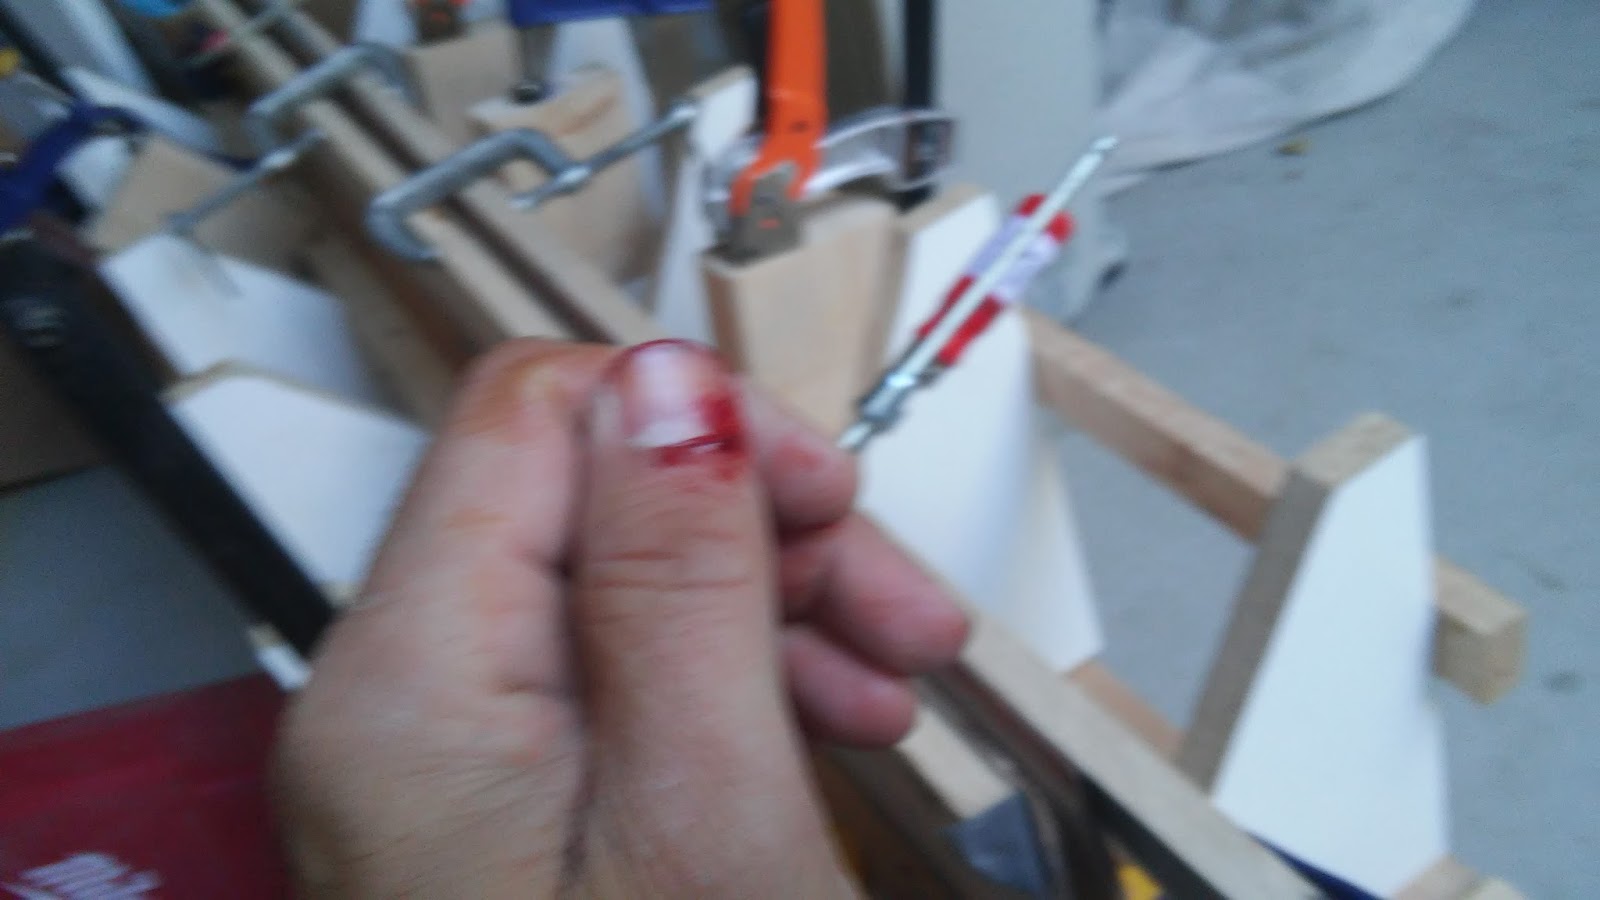
I don't know if its the cold or just trying to get things done quickly, but I have been real clumsy lately. On the upside I got the rudder compressed this morning. And besides all the fumbling around, it went fine. Here is a picture as I left it (warm tent not yet on).

And another of the profile of the rudder underneath all that.

I think I may have not put enough epoxy bead behind the leading edge. The leading edge angle seems a little small. From this point though I think I will get a rudder out of this try. Also I think I can re-hab R1 with some creative use of filled epoxy putty. If that works out I will have 2 slightly off rudders. I will then have to decide how much of a perfectionist I am, always a dangerous place for me to find myself.
Tuesday, November 24, 2015
R4 Holding
Went out at least 6 hours before the 24 hour mark to check out how R4 was doing. The epoxy looked good so I gave it its first squeeze and it barely complained. If this bears out I'm going to credit the heat. Here is the pic.

I will make some time this afternoon to mill down the spar and roll the dice tomorrow. BTW: the warm tent really works. The jig and all the parts were nice and warm to the touch.

I will make some time this afternoon to mill down the spar and roll the dice tomorrow. BTW: the warm tent really works. The jig and all the parts were nice and warm to the touch.
Monday, November 23, 2015
No Simple Matter To Get Back To Building The AMA
I recently moved the rudder jig out of the boat shed to the garage so I could get started on setting up the ama. The problem is I'm having trouble figuring out how this is going to work. With the rudder jig set up, there is room for little else in the garage. If I set up ama frames in the boat shed there will be room for little else in the boat shed. For the rudder I need space for the table saw, and room to cut full plywood sheets, and for the ama I need heated space to double epoxy coat the planking plywood. Also I only have one heater for rudder and ama work. I'm sure I will figure out how to step through this, its just not a s simple as one would imagine.
Cleaning Rudder Boogers
This was a mess, and honestly I wasn't at all sure it was a good idea even to try to clean this up. Turns out partially cured (under hardened) epoxy is very similar to boogers (mucus) only stickier and gummier. I cut off as much as I could with a utility knife, and then sanded my way to bare wood. The problem was that the epoxy-mucus just filled the sandpaper as if it were tissue. Here is the picture for those afflicted with morbid curiosity.

I feel good again about my chances to get a rudder out of these parts. I have them glued in the jig under the warm tent in the garage. I think its nice and toasty in the tent so I should be able to put the first bend in the rudder tomorrow. That will leave Wednesday to close the rudder before we leave town for the holiday.

I feel good again about my chances to get a rudder out of these parts. I have them glued in the jig under the warm tent in the garage. I think its nice and toasty in the tent so I should be able to put the first bend in the rudder tomorrow. That will leave Wednesday to close the rudder before we leave town for the holiday.
The Shame, The Shame!
I'm ashamed, very very ashamed. I didn't mix the epoxy correctly for Rudder 4. When I went to pre-compress it last night it just fell apart. I thought maybe I didn't put in enough hardener at the time but I was on autopilot and not really present in what I was doing. Not sure how to clean up the mess or if I should just cut some new rudder faces. I thought about not posting this but I think it is helpful to document everything, the good, the bad and the silly.
Saturday, November 21, 2015
Rudder 4 has begun (in the garage)
I cut the rudder faces for R4 yesterday and today got the jig moved into the garage. It was not as easy as it should have been. When I put the jig together I did not give any thought to the idea that I might have to move it before dismantling it. I just put in fasteners in a hasty way that I could not get to with the rest of the jig in the way. Nothing a bit of determination (and a dremel) couldn't fix.

I just applied the epoxy bead to R4 and put it in a warm tent in the garage. The little frame over the jig is to hold the tarp over the jig to keep the thing warm.

I just applied the epoxy bead to R4 and put it in a warm tent in the garage. The little frame over the jig is to hold the tarp over the jig to keep the thing warm.
Test Rudder 2 a Success!.....Mostly
Thanks to the warm tent the epoxy finally cured and I took TR2 off the jig. No delaminations, only a single tiny crack that is actually hard to see, and only one problem. First the good picture from the outside.

Now the problem. I'll be the first to admit that I did not do the best job of epoxy coating this closed, and it showed. At midspan the rudder pulled away from the spar in one area. The good news is that with the rudder off the jig it is easy to clamp this closed and get it tacked down properly with a second go with the epoxy.

This is also different than what I did before with Rudder 1. On Rudder 1 I epoxied the spar, and the carbon fiber all at once. I think taking this in steps is much better. For one thing it affords an inspection point to fix a spar to rudder joint issue (a problem Rudder 1 showed that I could not fix with the cf installed). And when carbon fiber time does come you can work on a rudder that is not under duress on the jig.
Friday, November 20, 2015
Its Cold, Very Cold
It got to almost freezing last night and I don't think the epoxy did much but sit there. I have talked to the epoxy supplier and they said if it gets cold it will just slow down the curing process, but that it will still cure. I built a warm-tent (a little frame to hold a blanket over the rudder but away from the shop heater) to get things moving. Hopefully I will still start setting up things for the AMA and preparing the garage to host rudder building. But it is cold and not much fun to be outside right now. Luckily I brought my epoxy containers indoors last night, which I had been meaning to to do, but actually accomplished just in time. Winter finally caught us and I will have to figure out how or whether to keep working in the cold.
Thursday, November 19, 2015
TR2 Closed!
I thought I was going to sneak up on this rudder and have the final closing of the rudder be simple and easy. I was wrong, I had left it compressed overnight in an "almost closed" condition. So the first thing I did today was to take off the clamps to see how far it had taken a set. Here is the deformation after day 1 and after day 2 respectively.


Can you tell which is which? Day 2 is on the left. Suffice it to say I didn't get much out of the second day of letting the rudder sit compressed. I tried to stay away from the wedges, but just could not get the rudder compressed down low where the spar is located. So after trying several different clamping strategies, I finally decided to use the wedges and finally got the rudder compressed.


Can you tell which is which? Day 2 is on the left. Suffice it to say I didn't get much out of the second day of letting the rudder sit compressed. I tried to stay away from the wedges, but just could not get the rudder compressed down low where the spar is located. So after trying several different clamping strategies, I finally decided to use the wedges and finally got the rudder compressed.


I included the picture on the left so the profile of the rudder would show. Even with using only the wedges, the trailing edge of the rudder was still pinned closed which will make it hard to install the carbon fiber. So I temporarily held the trailing edge open with 1X2 furring strip so I could get in there to epoxy the spar in place.

I'm going to let this cure and then remove from the jig to check things out and see if I could envision installing the carbon fiber. Tomorrow I will make real rudder faces and put in the jig in its current location. That doesn't take too long. Then I will start setting up a space in the garage for the jig and start laying out the footers for the rails to build AMA#1.
Wednesday, November 18, 2015
Rudder Programming Note
I freely admit that my project has become all about rudders all the time. And now as I'm closing in on how to actually build a rudder it turns out I still need to build 2. I've learned plenty but actually accomplished very little. So after I get TR2 off the jig, I'm going to move the jig to the garage and re-level (somehow). That way I can work on AMA #1 concurrently with fumbling my way through making rudders.
R.I.P. Rudder #1
OK so this rudder was already less than perfect. But it was going to be my back up. I missed the spar by a few mm when drilling the hole for a bolt. I could continue with this but I would have to rig some kind of way to fill that part of the rudder so water wouldn't just fill up the entire rudder.I think the lesson I learned here is to mark the centerline of the spar on the outside of the rudder faces before glueing up in the jig. The reason being that it is hard to find the edge of the rudder once it is covered in cured epoxy goop.

That is a valid fix, but the truth is this need not have happened had I been more careful. It's really a shame because while not perfect that rudder was really looking good.

That is a valid fix, but the truth is this need not have happened had I been more careful. It's really a shame because while not perfect that rudder was really looking good.
Test Rudder 2 Still Behaving
I continued compressing Test Rudder 2 today. The first thing I did was to take everything off and see if the rudder had taken a permanent deformation. Here is that picture.

It looks like it bent about halfway. I didn't think about taking any measurements until later (of course). Here is the after picture where I am going to let this rest for 24 hours.

Besides some fumbling with the clamps there were no real problems, the gap started at 20mm over the spar and I stopped at 10mm over. There was some fumbling with the clamps. I think I may use the wedges at least to hold the rudder compressed while epoxy is applied.
Tuesday, November 17, 2015
Rudder 1: Continuing to Impress
I sanded down the leading edge again today, its looking pretty good. There is still one very small low spot that I will fill next time I'm mixing epoxy. Next real step now is going to be to cut in planform shape.


Test Rudder 2. Varying the Approach
I'm back at this with test rudder 2. I feel like if I slow down a bit I may have more success. Specifically I'm going to try to bend this in steps with about 24 hours in between. The hope being that the slower process will allow for the plywood to take a permanent deformation to the first bend before asking it to bend further. The first step completed was to clamp it at the trailing edge, since that is reliably accomplished.

I'm going to measure the total gap at the spar and try to cut that in half tomorrow. Then I will go for closed on Thursday.
There are a couple of other things worth mentioning:
Its been raining reliably lately, I left the shed heater on in the hopes of raising the temperature a bit and increasing the relative humidity. I don't think this is really that much of a determining factor, but it was one of the coldest days we've had when I was trying to bend Test Rudder #1, which I'm sure only hurt my chances for success.
The other thing to mention is that I think little by little my epoxy goop mix has gotten thicker and thicker (its fun adding the powders). On TR1 it was like mayonnaise and Benrd's instructions show the stuff pouring, closer to a syrup. This may be a big deal because when cleaning cured epoxy off squeegees I was astounded at the flexibility of the cured epoxy. At the other extreme I was amazed at the stiffness of the cured filled epoxy goop. So if backing off the fillers gets me a cured bead with some compliance, that will only help.
A Note on Context
I named by blogsite boats and life because I knew my life would get in the way of my boat, if you know what I mean. The concept I think about often is the idea of context, and fit. Anything that exists has to exist in a context. A set of conditions that allow for its existence. This is universal and inescapable. I try to remember this when family events and needs impinge on time that I would have rather spent in the boat shed. Maybe this is just a long winded way for me to say that I have to make building a boat fit in my already full life. I can't allow for this to ever come to a choice between my family (and their many needs) and my boat, because the boat will lose. With that said we just saw off company visiting from overseas yesterday and we are expecting a family friend tonight. But I will get a little something done on test rudder #2 today.
Friday, November 13, 2015
Test Rudder 2 on its way
I figure I can make 3 more test rudders from the scrap I've already generated hopefully it won't come to that. I cut marked and glued test rudder #2 this morning. Didn't take too long, good thing because I have a water polo game to attend this afternoon.


Thursday, November 12, 2015
Test Rudder Broken, but.....
The headline here has to be that I broke another rudder. Here are the details. I came up with a way to hold the wood spar in the right location without attaching it to either side. I was thinking about something Bryan said about leaving the spar too long at the start. So I left the spar too long and supported the overhang at either end of the jig using a threaded height adjustment.

What you may to be able to see is a T nut installed on some furring strip with a bolt threaded into it. This way I can adjust the height of the spar (to align to marks on the rudder). All was going very well, I had the rudder compressed (using clamps and some 2x4s for bearing plates at the trailing edge).


What you may to be able to see is a T nut installed on some furring strip with a bolt threaded into it. This way I can adjust the height of the spar (to align to marks on the rudder). All was going very well, I had the rudder compressed (using clamps and some 2x4s for bearing plates at the trailing edge).

This picture was before I had done the spar support thing. I was re-doing all of this (with the spar in). and pretty much had it all together. I was trying to squeeze out a last tiny bit of gap between the spar and the inside of the rudder face when it cracked right down the front edge. A couple of things to consider. One, I don't think my leading edge goop was fully cured. It was about 24 hours since I put it on, but is has been cold. Two, I'm beginning to question the wisdom of the wedges. Specifically I wonder if they are robbing the rudder faces of a degree of freedom they need as they try to rotate about the leading edge. I could likely confuse myself hopelessly trying to figure that one out. Instead I will make a new test set of rudder faces and try this exact approach (hopefully in less of a rush). This time without wedges and with letting the leading edge goop get actually cured.
Tuesday, November 10, 2015
R1 Continuing work
Last update on R1 was I gooped on some toothpaste thickness goop to give me something to sand into a leading edge for the rudder. I'm happy to report that it worked out very well.


There are still a few low spots so I did another round of filler and then will sand again.
Belatedly Doing a Test Run
I'm finally listening to good advice and doing a test run. At least this way if I crack it again I'm only out some scrap plywood and epoxy.
Why will this time be different? (feel like I'm getting back together with an old girlfriend)
1: I will mask the epoxy goop fill line to insure no excess goop bead width. If you open the picture below you can see all the extra goop I was getting all over).


2: After goop bead is cured, I will apply thickened goop bead to outside leading edge (to prevent delamination of the plywood). I'm getting better at manipulating loose goop

3: Will defer bonding in AYC spar until rudder is compressed. Locating strategy-TBD.
4: Updated wedges (also considering putting tape on jig faces to reduce friction).
Parting thought. R3 was very nearly closed when it cracked. So the hope is that some marginal improvements will be enough.
Why will this time be different? (feel like I'm getting back together with an old girlfriend)
1: I will mask the epoxy goop fill line to insure no excess goop bead width. If you open the picture below you can see all the extra goop I was getting all over).

I waited about 25 minutes before pulling the tape off. hopefully this helps.

2: After goop bead is cured, I will apply thickened goop bead to outside leading edge (to prevent delamination of the plywood). I'm getting better at manipulating loose goop

3: Will defer bonding in AYC spar until rudder is compressed. Locating strategy-TBD.
4: Updated wedges (also considering putting tape on jig faces to reduce friction).
Parting thought. R3 was very nearly closed when it cracked. So the hope is that some marginal improvements will be enough.
R.I.P. R3
Bad things continue to happen. I cracked the rudder again. Not only that, a good part of the leading edge delaminated, the plywood just tore itself apart. Here a the gruesome pictures.


BTW: The link to Bryan's Blog is in the links section.


Bryan Cox (builder and sailor of a Duo 480) and I have been discussing these misfortunes (see comments on prior posts). Most of our discussion has been about how to compress the rudder while the various epoxy steps are completed. While this is important I suspect we are missing something. I don't think you get plywood delaminating itself as above because you chose an awkward way to compress the rudder faces. This delamination is a function of the geometry at work.
I hold Bernd's design as above reproach. So without changing the geometry, and putting aside for the moment the question of how to compress the rudder. What could cause the plywood to come apart like this? My theory of the case is that the design is fine, the jig is fine, and even the wedges are fine. I think the issue is that my rudders must not reflect the design in some meaningful way. Let me interject an observation that the cured epoxy goop is very rigid (feels like a hard thermosetting plastic). It may be hard to tell from pictures, but I know I'm a bit of a mess when putting the epoxy goop in the groove. I'm thinking I'm leaving a small radius of goop at the edges, and given the remarkable rigidity of the cured goop, I effectively still have a goop bead that is too wide.
Another observation, is that the rudder faces only delaminated where the goop did not leak through and cover the leading edge. So next time after glueing in the jig, I will fill the outside leading edge joint. Similar to what I'm doing with R1.
Lastly Bryan is right that pre-gluing the spar into the rudder seriously increases the stiffness of that face (how could it not). Having one side stiffer than the other is likely creating some stress concentrations that should not be there. Locating the spar in a compressed rudder presents some challenges, but right now I'm just producing broken parts.
BTW: The link to Bryan's Blog is in the links section.
Updated Wedge Design
I think I figured out why my rudders were walking out of the jig. As always a picture is worth a thousand words.

I think every time I let go of the clamps the rudder would tilt the wedge just a bit. Then when I clamped down again first the wedge would slide against the rudder till flush on jig and then compress the rudder more. Repeat many times on both sides and you have a rudder that walks out of its jig. Luckily the solution is simple. I just moved the 1x2 from the trailing edge to the leading edge of the wedge. This should balance much better.


Kinda hard to see in this picture but the top one is before, the bottom is after.
Sunday, November 8, 2015
Rudder 3 Problems
Not sure how to organize my thoughts on this mess so I'll just let you, my poor reader, have it. I tried to close R3 (as I'm affectionately referring to my 3rd rudder attempt). At first all seemed well but as I got it closer to closed I noticed that the leading edge of the rudder was not sitting down in the bottom of the jig. I thought that must be why I'm having such a hard time on the clamps. So I found that my track saw clamps have very narrow arms and fit nicely inside the rudder, I proceeded to use those to hold the rudder down in the jig.


So with this "fix" done I continued to crank away on the clamps. I was getting really close to having the rudder closed when I heard the dreaded cracking sound. So I quickly undid everything and pulled the rudder off the jig. Turns out that the the goop bead had started to separate at the leading edge at one end of the rudder.

I think my genius move with the clamps came back to bite me. I think the tang of the clamp must have acted like a lever to pull the plywood off the goop. That said the jig should have been holding this together. I think there is something about the geometry that is pulling the rudder up and away from the jig as I crank down on the clamps. My theory is that because the part of the wedge that slides on the angle is longer (in the vertical) than the part that slides on the rudder, I'm getting a little turning moment. Its working on both sides and bit by bit wants to walk my rudder out of its jig. I haven't done any actual calculations (I would have to make so many assumptions that any answer I could get on this would be meaningless). But I am going to fiddle with the wedge shape a bit before getting back to this. As far as R3 goes I epoxied (no filler) the crack and will try to see if I can still get R3 to close. I will also be sure to post before and after pictures of the cross section the wedges.
Saturday, November 7, 2015
AYC Spar Glued Into Rudder 3
I didn't get much boat time today since I spent all day at my older son's water polo regional tournament. The good news is we got 3rd place. State championships here we come.

Thanks to my astute purchase of a very bright work light, I was able to glue the AYC spar into rudder three tonight. Not much work (approx 10 minutes) but getting the epoxy curing now saves a day long wait. BTW, it was not that hard to mark the spars location with the rudder faces glued.

Continuing Work on Rudder #1
I got a chance to get back to work on the good rudder. I noticed that the leading edge looked a lot better where some of the epoxy goop had squirted through. Of course this did not occur uniformly. So I figured that an extra thick batch of epoxy-microballoons-silica goop was in order. I used "L" brackets (made for my son's birthday party) and some scrap pieces to make fences to hold the rudder up.

Here is a picture showing where the goop did not spill through.

Next it was time for the goop. I made it really thick, about like toothpaste.

I may have gotten a little carried away with the goop. It just sands down so nice that I figured putting some extra down wouldn't hurt.

Here is a picture showing where the goop did not spill through.

Next it was time for the goop. I made it really thick, about like toothpaste.

I may have gotten a little carried away with the goop. It just sands down so nice that I figured putting some extra down wouldn't hurt.
Rudder #3 Under Construction
I applied my lessons learned and so far....so far (I dont want to jinx it). He are the two rudder faces I cut and bevel cut today.


Might be hard to see here but I actually have two red stripes on one of them because I measured wrong and didn't catch it until I noticed how differently the lines on each board were located, close call.
With that done I got them taped together and am embarrassed to report that the taping was easy. All I did was lay them flat on top of each other and tape the edges together. I was making that so much harder than it needed to be.
With that done it was short work to put them in the jig and pour in the goop. This time being very careful of the fill-to lines.

Besides this work I also milled down another AYC spar for my 3rd rudder attempt. I did have one oversight. I meant to mark the location of the spar on one of the inside faces before this step. Not a huge deal, making the mark will just be a little more fiddly now.
Friday, October 30, 2015
A Note on Costs
For this blog I am trying to document everything, good and bad about my experience in building my duo 660. This should include the experience of paying for things. I'm planning another post on sources, for now this is just how much I've spent on boat stuff. I've tried to be comprehensive but I'm sure of missed some little stuff. The other thing to keep in mind is this is only my experience where I already had a lot of tools and using the build approach that I've documented here. So with the caveats out of the way here it is:


I broke it up into recurring materials and non-recurring tools and equipment. This is an early look yet, when I start to plank the first ama I will be looking at some more serious plywood and epoxy costs.
Tuesday, October 27, 2015
Finding Interesting Ways to Screw Things Up
I knew something was up when I let go of the clamps and the rudder still creaked. The symptom of the problem was that no matter how hard I cranked down on the wedges I couldn't close the rudder at the spar. It was closing at the trailing edge before it was touching at the spar. So I took this picture, took a break and thought about my options.


We have company in from out of town for Halloween, did I mention this holiday is a big deal, so now it really will be a week until I'm back at work on my boat.

I was thinking looking at this that I poured the leading edge epoxy goop to high, and thus too wide. Being ever the optimist I thought that maybe it would just be a different shape than the other rudder and gave a couple moments thought to the sailing implications of having two rudders of differing sections. Thankfully I didn't spent too long on that, and decided to pull it off the jig before investing carbon fiber into it. The creaking sound I heard was the sound 4mm Okume marine plywood makes when it cracks.

Doing a post-mortem on this, the proximate cause is obvious (too much epoxy goop bead), but the real culprit is overconfidence and haste. When I poured the bead in the rudder I only had a bit of time and did things quickly since I figured I had this down.
So after two rudder attempts I'm 1 for 2. Here are the two things I will do differently and why:
1. Mark epoxy goop fill line on rudders with red marker or something significantly more visible than a pencil line. Its too easy to lose sight of the pencil line and start guessing at where it was.
2. Change order of operations: epoxy rudder faces with goop in jig first, then epoxy spar onto one side. With the spar pre-installed it is just in the way just enough to be a pain when putting the goop (contributes to losing sight of the fill line).
We have company in from out of town for Halloween, did I mention this holiday is a big deal, so now it really will be a week until I'm back at work on my boat.
Subscribe to:
Posts (Atom)