
The Searchlight
Thursday, March 31, 2016
Boat Building Music
I was thinking today that if anyone is reading this as research in considering their own build. Then they would be wise to consider the music to which they will work. My build has progressed while listening to The Cat Empire exclusively. I suppose most people would say they are a ska band but they cover a wide range. I love their music, (own all their albums) they have something to say, and do so with a fantastic horn section. I can geek-out about their music for awhile but I will leave with a linked video of one of my many favorites.
Catch Up Work Almost Done
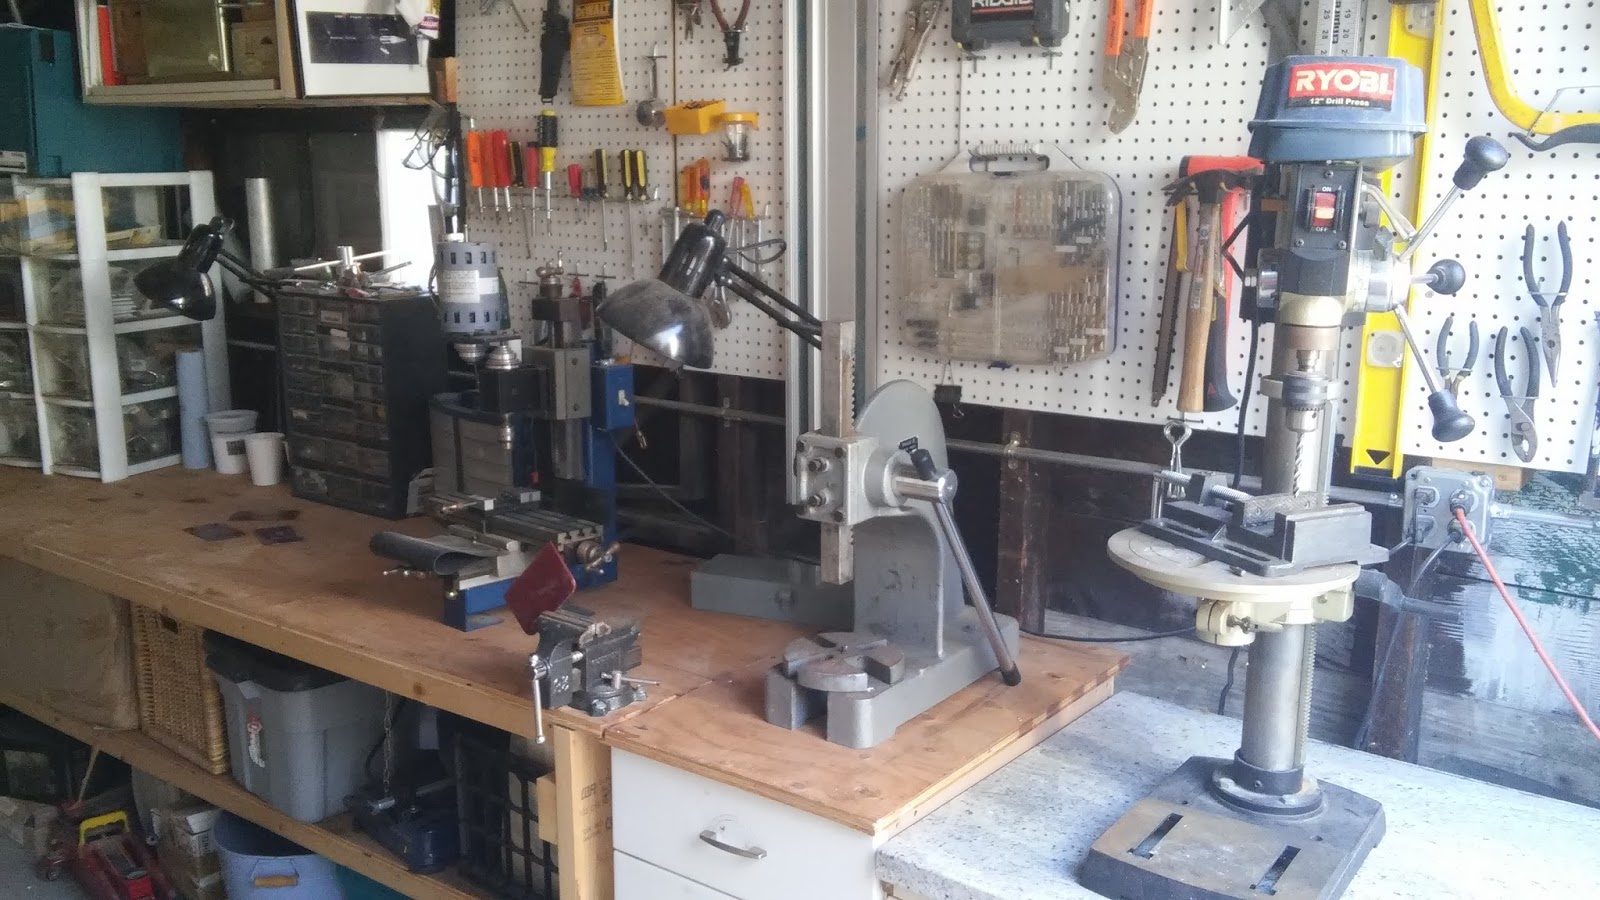
It's been a week of catching up on things around the house and with the boat. Where "catching up" is taken to mean doing things that should have already been done. Managing to keep up the pressure on boat progress though. I got the second epoxy coat on the second sheet of plywood this afternoon and actually cleaned the garage.

Granted it's not gleaming, but I didn't have the heart to take a before picture. The shop vac I have connected to the sander was making some ugly noises, turned out it was very full. So I emptied it and cleaned out the filter, hopefully that will make it healthy again. With the tools all set to go, the next step is to trim the garboard and then see if I cant squeeze in epoxy coating two sheets of plywood at once.
Granted it's not gleaming, but I didn't have the heart to take a before picture. The shop vac I have connected to the sander was making some ugly noises, turned out it was very full. So I emptied it and cleaned out the filter, hopefully that will make it healthy again. With the tools all set to go, the next step is to trim the garboard and then see if I cant squeeze in epoxy coating two sheets of plywood at once.
Another Day, Another Coat Of Epoxy
I did start the clean-up process and was impressed with what I got done in a short amount of time. Still quite of bit to go though. In order to keep up the pressure I put the first coat of epoxy on another sheet of plywood. Here is picture of showing how full the boat shed is. I had to prop open "door" because it was getting too hot!


Tuesday, March 29, 2016
Just Wondering A Very Specific Wonder
If a boat has a rotating mast, then is it true that the cleats for the halyard, downhaul and reefing lines need to be cleated off on the mast (or some appendage to it that rotates with the mast).
If these lines were cleated on the deck then they would alternately lower, loosen, or tighten the sail, or resist the rotation of the boom.
I'm not sure I'm as sold as I once thought on a rotating mast.
If these lines were cleated on the deck then they would alternately lower, loosen, or tighten the sail, or resist the rotation of the boom.
I'm not sure I'm as sold as I once thought on a rotating mast.
Journey Of A Thousand Miles Begins....With A Coat Of Epoxy
We are now sans house guests so the day was spent "digging out" of all the household things that get ignored when company is here (the pile of laundry was comically huge). That said, I did keep up the snail's pace of progress by getting the second coat of epoxy on the first sheet of plywood. One done, three to go.
Monday, March 28, 2016
Busy Day, But Not Wasted
Today was busy with a lot of things not called my boat. But I saved the day of progress by running out to the boat shed late in the day and getting a coat of epoxy on a sheet of plywood.

If I get some more time this week I'll see if I can figure out how to squeeze in doing two sheets at once. Which will require a little creativity and a lot of cleaning up. The cleaning up is overdue anyway.

If I get some more time this week I'll see if I can figure out how to squeeze in doing two sheets at once. Which will require a little creativity and a lot of cleaning up. The cleaning up is overdue anyway.
Sunday, March 27, 2016
Garboard #2 Installed
I think this is likely the technically hardest plank to install on the entire hull. More difficult than the last one since few clamps could be used. That said, this went very smoothly. I knew what to expect and just progressed through the steps without drama.
After doing all the test fits and predrilling the clearance holes in the plank, here are the steps (the tab nearest the transition joint is loose to start):
1. Butter all the hull interfacing surfaces with filled epoxy
2. Place Garboard by locating at transition joint and seat in tabs.
3. Clamp at bow
4. Tighten tab nearest transition joint
5. Work backwards from bow installing screws (push plank down to seat, then tighten screw).
6. After all screws in add some clamps near bow as needed.
- done
Here are some pictures,
First a before:

Then an after:

And this is the view on the keel side, attempting to show where the plank interfaces the keel. ( I used the leftover epoxy to fill some inadvertent gouges I put in the keel when sanding down the other garboard.

I did buy more plywood and now will have to spend time doing the epoxy coating. I will try to stay productive (butt strapping, cleaning the boat shed and garage) but there will be few days now with nothing to do but watch glue dry.
Thursday, March 24, 2016
Fighting The Potato Chip
It has been awhile since I epoxy coated these sheets of plywood. This was my last sheet, and it has sat in my stand for some time. As such it had taken on a potato chip kind of shape. So as I put this on the hull I had to convince it to give up the potato chip shape and take on a boat hull shape. Not terribly hard but just a little something extra to with which to contend. Here are a couple of pics.


Next step will be to get this trimmed and then tackle the next garboard. Then progress will slow due to me having to get and then coat more plywood.


Next step will be to get this trimmed and then tackle the next garboard. Then progress will slow due to me having to get and then coat more plywood.
Wednesday, March 23, 2016
Garboard Stayed Put and Trimmed
I still can hardly believe this is done. I trimmed the garboard, first with the Fein and then with the belt sander. So here are a couple of pictures showing progress.

This one shows the post-belt sander condition.

Last detail is the weirdness at the aft end of the plank. the keel has a small flat zone in between the buttstraps on either side. Using the track saw (without the track) I cut a straight line cut attempting to match the edge of this flat zone. The idea being that if I can do the same thing on the other side then the filler needed over this joint can extend both aft of BH3 and forward of BH3 by this much. See picture below.

This is kind of hard to explain in words but should become more clear as I do this and take pictures as I go.
I was so happy to do this I didn't do anything else today (except buy some new gloves in celebration). Next trip out to the boat shed, I need to trim and sand the next butt strap and glue up the next big plank.
Tuesday, March 22, 2016
Garboard Installed
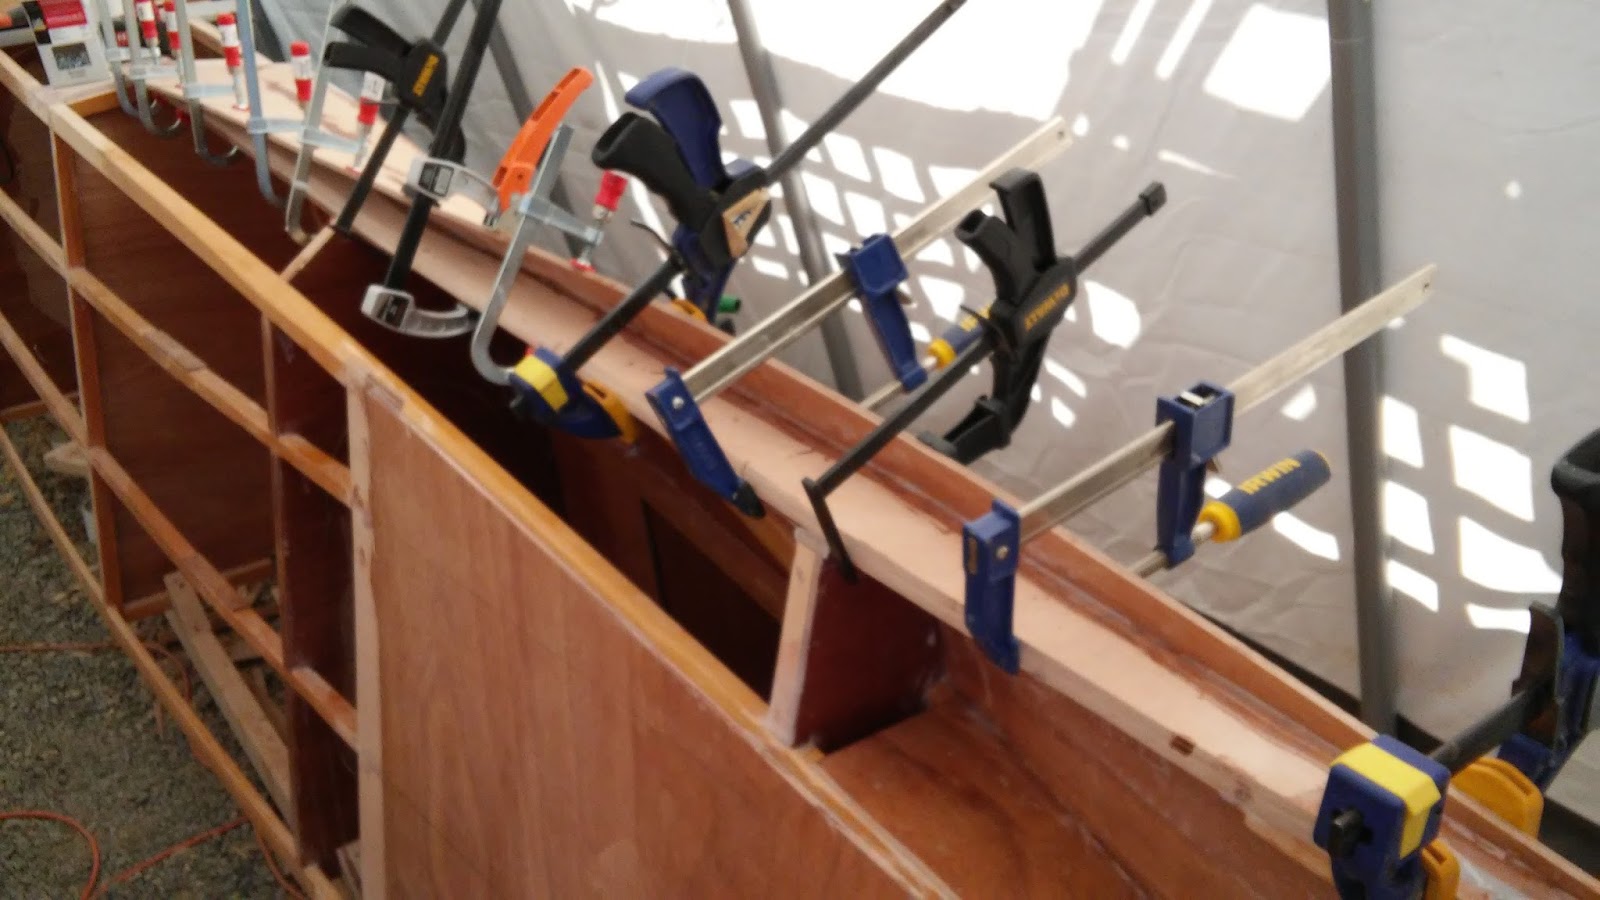
The weather cleared this afternoon, so I went outside did some extra cuts and got the garboard installed. I used these tabs I saw on the Yikes blog, picture below.

They helped immensely, the main thing is that I could place the plank on the hull add one clamp at the bow then not worry about the plank falling off or moving around. In addition to cutting the relief a little deeper and at a slightly higher angle. I sanded a bit of a chamfer on the inside edge near the transition joint. The other thing I did was pre-drill holes in the plank only, to prevent the screw threads catching on the plank and pulling the plank away from the hull as they are tightened. I used almost every clamp in the house to hold this down.

This is a luxury I won't have for the next garboard. So for the next one I will need to use more screws. Finally here is a picture of the other side. The plank seems to interface all the hull parts well and it is cool to see the plywood curve.

I still can't quite believe that this is done so I'm reserving any celebratory thinking until I get all the clamps and screws off and everything stays where it should.

They helped immensely, the main thing is that I could place the plank on the hull add one clamp at the bow then not worry about the plank falling off or moving around. In addition to cutting the relief a little deeper and at a slightly higher angle. I sanded a bit of a chamfer on the inside edge near the transition joint. The other thing I did was pre-drill holes in the plank only, to prevent the screw threads catching on the plank and pulling the plank away from the hull as they are tightened. I used almost every clamp in the house to hold this down.

This is a luxury I won't have for the next garboard. So for the next one I will need to use more screws. Finally here is a picture of the other side. The plank seems to interface all the hull parts well and it is cool to see the plywood curve.
I still can't quite believe that this is done so I'm reserving any celebratory thinking until I get all the clamps and screws off and everything stays where it should.
Monday, March 21, 2016
Math Skills Letting Me Down
So I took a few measurements from the boat and did a little bit of trigonometry as follows:

Basically I measured the height of the chine at station 96" from a level line taken from the lower edge of where the garboard begins at the bow. Then I calculated the implied angle (5.5 degrees). So if there were no round shapes to worry about that would be the straight line angle. Then I took that 5.5 degrees and calculated the straight line height at 48" where the transition joint is located. I got a height of 4 5/8 inches. The difference of 6 - 4.625 should be the depth of cut I need. It isn't.
My guess of a cut I did was about 2 inches deep and it clearly needs to be deeper. I'm going to spend a few more minutes on the math, and I do mean few. I will likely end up going trail and error, but to avoid drilling and re-drilling holes in the hull I will use an approach like I saw on another boat building blog. Link here: Yikes (I'm slowly reading this blog, it is in my links section). If this works then I can cut and try it out and recut and try again without inflicting any further damage to the hull.
Sunday, March 20, 2016
1st Garboard Attempt: A Complete Cluster
This was the biggest cluster I have engaged in since rudders. First off, I trimmed and sanded the 3rd plank, so far so good. Picture below.

But when I went to put on the garboard (with wet glue, by the way) after pushing very hard, I ran out of garboard at the chine (aft end). Basically where I thought I would have garboard over-hanging the chine to trim later. I had hull frame not covered by the garboard plank. I did test fit this and it was fine. That said, when I test fit it I allowed the garboard to spring away from the boat over the bow plank (because there is no obvious way to clamp this down). When I tried it for score I had this area screwed down and there was no way to pull the garboard back to cover the frame properly. I briefly put on a piece of scrap over the open space, but this seemed like a poor solution. Also I still had a pretty big gap at the transition joint. I could see right through the joint to the inside of the boat. I think this was because I was pulling back on the plank to try to get it to cover the hull frame. So I pulled everything off and tried to clean up as much of the epoxy mess as I could to save sanding work later.
So after thinking about this for awhile, I figure that I need to cut the relief on the garboard plank for the bow plank much deeper. The problem is that I'm not sure how to tell how deep it needs to be cut (I'm going to sleep on that one, perhaps I can math my way out of it). The other thing that needs to be addressed is the excessive amount of force I'm using to intimidate this poor piece of plywood into submission. I'm thinking I might try cutting slits lengthwise in the garboard plank to relieve some of shear stresses that the bend is inducing in the material. My suspicion is that the plywood will gladly bend, but is very resistant to shear loads of the kind I'm inducing with this twist. I will start the slits with the Fein tool, but complete them with the jig saw since the jigsaw blade is thinner. And it is easier to control the jigsaw freehand than the Fein.
This is getting detailed. I'll see if I can come up with a succinct way to convey as I go. I am disappointed that I cannot report a successful garboard installation. But I am learning a lot about how to do this in a very hands on way, which is gratifying enough to keep me coming back for more.
Friday, March 18, 2016
First Sail of 2016
The weather finally broke down and gave us a decent day. Also with our nephew, international man of action Rodrigo Horna visiting, we just had to get out on the water. We left him on tiller duty for the duration and he handled the boat (a C&C 27) just fine.

This outbreak of nice weather will not last long so we had to make the most of it.

This outbreak of nice weather will not last long so we had to make the most of it.
Thursday, March 17, 2016
Planking Is Going To Take Time
I more or less recovered from my mess yesterday. I glued the butt strap and the third plank, also I cut the garboard blank for the other side. Here are the pictures of the third plank.
First the outside: I left it a full sheet because I figured I only risked cutting it too short by pre-trimming and stood to gain nothing by doing so.

Then the inside:

It lays on the frame well, although I think I made this harder than necessary . Mostly because my epoxy mixing cups are too small to make enough goop at one time. Then I start freaking out since I think I'm taking too long to get everything seated. In the end the outcome is likely the same or worse than if I would simply go about the steps that I know are needed, sans the freaking out.
So the anticipated slowdown has a few of causes. The first is that our nephew is visiting for about a week and a half. He is grown, but has never been to Seattle before so we will spend some time doing the tourist stuff around town. I'm happy for him to be here but it will detract from time in the boatshed. We will also be traveling to visit family for Easter the following weekend. The last and only embarrassing reason is that I did not buy enough 6mm plywood. I assumed better efficiency than I'm getting in the planking and I flat out did not account for how building up the keel and butt straps would add up. The real delay here it the two coats of epoxy that need to cure. If you add up all these various issues you can just hear the schedule expanding.
Wednesday, March 16, 2016
Garboard Isn't Going To Go Quietly
I got a little off my game today. The first problem was that the epoxy on the butt strap installed yesterday was not all the way cured (It's been cold and the heater in the shed just takes the edge off). So after trimming there wasn't much more to do with that. So I cut the reliefs for the butt strap on the opposite side. Still had some time. So I cut a garboard blank using the cut-off piece from the bow plank as the guide. Now I was getting excited, I've been thinking about this garboard plank more than I care to admit. After much wrestling, fumbling, and gnashing of teeth, I got the thing situated and held in place with clamps. Here is the pic so you can see what I mean.

The plywood, while it takes the shape, really doesn't want to bend like this. I have some things to think about. Firstly the brad nailer is out classed by how hard this is to push into place. So for these two planks it will be a glue and screw approach. I'm going to make a trip to the hardware store to find some screws with a large flat head. For the bow planks I just used some construction screws I had and the tapered head buried itself in the plywood. No big deal for the light loads on that plank, but that is not going to fly for the garboard. The other weird thing is how these are going to terminate at the keel. I think they will butt joint at the very end and then quickly open. Exactly how that transition will look is a little worrisome. That said I just can't keep thinking about this, I'm just going to try it and see how it comes out. I can always fill weird little pockets or shape things as needed with the belt sander.
Also of note is that my marine plywood, came in over length by 2.5 inches! I have never heard of such a thing. Of course I already had my butt straps aligned for an 8 foot length so I had to cut off a bit of my "free" plywood. I tried to blame myself for this but I just cannot imagine verifying my plywood lengths as a thing to do.
Now my steps are all messed up. I spent all my time fooling around with the garboard and did not glue up the second butt strap. And to compound my problems, inexplicably, I cut what will actually be the second garboard to be installed. Hopefully tomorrow will be a better day for well thought out progress.
Butt Strap Trimming Video
I've been meaning to do this for a while and finally remembered. I took a short video of the Fein tool at work trimming the butt strap installed yesterday. I usually take a few passes and try to be careful. For the video I did not cut it too close to the chine because I was doing it one handed, my left hand was holding the camera. So this is how well it works one handed cutting through 6mm plywood.
After the video cut I took one more pass with the Fein (using two hands) and then hit it with the belt sander for about 30 seconds. Here is the result.

After the video cut I took one more pass with the Fein (using two hands) and then hit it with the belt sander for about 30 seconds. Here is the result.

Tuesday, March 15, 2016
2nd Plank Installed
I got the second plank on today and I installed one more butt strap on one side of the hull. This butt strap ends up being near another bulkhead so I didn't get to use my router frame as I had hoped. I still used it to mark off where to clamp on stops to limit the router cut but that was all. I used the same approach to the plank installation as yesterday and all went well. I was more careful in marking the pencil lines on the outside over stringers and so I didn't miss with the screws (only used 2). Here is a picture of the plank as installed.

Below is a picture of the router cuts for the butt strap.

And finally the butt strap installation as I left it.

It would be cool if I could get into a rhythm of installing a butt strap and plank a day until done. But I'm dependent on dry weather to cut planking blanks.

Below is a picture of the router cuts for the butt strap.

And finally the butt strap installation as I left it.

It would be cool if I could get into a rhythm of installing a butt strap and plank a day until done. But I'm dependent on dry weather to cut planking blanks.
Monday, March 14, 2016
Planking Has Officially Begun
Back from a weekend spent swimming with the kids in a hotel pool. Nothing spectacular but it was nice to get out of town and have someone else do the cleaning for a couple of days. With two days away from my boat I was ready to get back out there. I faired off the garboard butt straps and got the first bow plank installed. First a picture of the butt straps.

Then this is my preparation for installing the plank. I got it in position fore-aft and vertical, and then traced a line in red marker on the butt strap. That way I could quickly tell when I had it right while it was on wet glue. I also traced pencil lines on the outside over the stringers that way I would have a target to hit with the nailer.

Then I took a deep breath and reviewed the plan.
1. Butter all the stringers/chine/shear/butt strap with filled epoxy.
2. Position plank and clamp at chine and BH2 (red handle clamp)
3. Clamp at bow top (blue clamp). Cant really see this in picture, it is on the bow/shear joint.
4. Install 2 screws in the middle stringer mid span BH0 - BH1 and BH1 - BH2.
5. Go a little crazy with the polymer brad nailer.
The screws were needed to suck in the plank to make it follow the hull curve. As it turned out I used three but the extra one did not seem to make a difference. Also I missed the stringer with 1 screw so have a hole to repair. Here is the after picture (I can't get that great an angle for pictures in the boat shed).

On the inside the plank appears so sit pretty well on the frame, there is some very small gapping near bulkhead 2 but very minor and I'm not going to worry about it. Here is the picture from the other side.

I spent all my time for the day, so I will have to get to the other bow plank tomorrow. But for now I'm feeling good.
Friday, March 11, 2016
Another Day Spent Butt Strapping
I've decided that I'm not going to do all the butt straps first and then plank. I'm going to install butt straps as needed as I work my way from the bow to the transom with the planking. That said I could have put the bow planks on except they still needed one more coat of epoxy, which I completed today. I also cut and installed the butt straps for the garboards aft of bulkhead 3. A couple of notes, I did check with Bernd on installing the butt straps right next to a bulkhead, he said that was fine. He also mentioned that he likes to stagger butt straps so they do not all occur at the same station. With all that said, here are a couple of pictures.

The picture below shows how the but strap lines up to the bulkhead/chine/keel edges.

So that is it for any progress on this boat until Monday, Taking the kids on a weekend road trip. If I can get my mind my off my life inside the boat shed I should have a good time.

The picture below shows how the but strap lines up to the bulkhead/chine/keel edges.

So that is it for any progress on this boat until Monday, Taking the kids on a weekend road trip. If I can get my mind my off my life inside the boat shed I should have a good time.
Thursday, March 10, 2016
The Devil Walked The Earth Today
I'm not superstitious myself, but I like superstitions. There is a humility to them that is refreshing and instructive. Today it was raining while the sun was out, so that means the devil was walking the earth, of course. The supernatural weather notwithstanding, I did get some boat work done today. First off I really underestimated how much work it was going to be to finish fairing the keel and bow. Also I faired off the first two butt straps and got the first coat of epoxy on the bow planks. The bow planks are more or less covering the hull so this is the only picture that made sense to take.

This is the faired edge of one of the butt straps at the chine. I will make it a priority to get more done tomorrow because we are taking the kids traveling for the weekend. Basically the kids and I are tagging along on one of my wife's business trips so the kids can go swimming. We haven't left town since Christmas, so we are due. The downside is I won't see the inside of the boat shed again until Monday, the earliest.

This is the faired edge of one of the butt straps at the chine. I will make it a priority to get more done tomorrow because we are taking the kids traveling for the weekend. Basically the kids and I are tagging along on one of my wife's business trips so the kids can go swimming. We haven't left town since Christmas, so we are due. The downside is I won't see the inside of the boat shed again until Monday, the earliest.
Tuesday, March 8, 2016
Butt Strapping!
I know it's juvenile for me to go around saying "butt strapping", but that doesn't make it less fun. I did get a good few hours in the boat shed and am happy to report that my router frame works perfect.The first one I did came out a bit rough. It looked like I gouged out the wood with my teeth.

For the first two cuts I used a level to keep the strap vertical, for the later ones I just made sure that they were lined up to each other. Bernd calls out for 12 cm wide straps which gives lots of wiggle room. The other Bernd genius move was that 12 cm is perfect to fit my palm sander in the relief with a little extra room for smoothing out the bottom of the cut.

I got faster and better at it as time went on. Here is picture right after using the router with no sanding done yet.

Finally I epoxied the first two straps in their places. I used the polymer brad nailer and have come to love that tool, faster and less fuss than clamps, and way faster than installing then removing and filling screw holes.

Tomorrow I need to finish fairing the bow and keel (not much work). Fair off these butt straps, and epoxy coat the bow planks. I have to do this because I traced the bow plank on the non-epoxy coated side, so I could see the mark. So that means the bare side is facing inside the hull. So I've got two days of epoxy coating before I can install the cut bow planks. Normally I would be annoyed at this, but I've got so much fairing and butt strapping to do that the extra time on the bow planks should not effect me too much,
Monday, March 7, 2016
Thank God For Sunbreaks
Today was mostly spent on fulfilling my self-imposed discipline of feeding my family and insuring that they wear clean clothes. I do wish that like some creatures we could survive by eating a huge meal once a week. That evolutionary feature would really help me make progress on my boat. As things stand I have to feed myself and family several times a day, everyday. Anyway enough of that. I did do a bit of work that is new on the boat. I made a small frame that I can clamp on the chine or stringer that needs to be router cut to provide relief for butt straps. Here is a picture of the frame on a test-cut piece of lumber. We got a few hour sun break this afternoon, very welcome.

And this is how I left it, all set up and ready to be used to cut the first relief.

It was good to use the router today. It wasn't that hard to control. You just have to be really careful when you first turn it on, because it tries to twist out of your hand as the motor spins up. Once it is at speed it is much more predictable.
Sunday, March 6, 2016
Let The Planking Begin
I didn't work on the boat yesterday, there was a moment of truth where I could either do my workout or work on the boat. I chose the workout. Today I got chased inside this morning by rain. But when we got a sun-break this afternoon, I ran outside and got all my critical cutting jobs done (we are expecting rain all week). I cut enough butt straps for the entire ama, and blank cut and then traced cut both bow planks. Given all the steps I have to go, this should keep me busy until we see sun again. Here is a picture of one bow plank clamped into position so I could trace the chine from the inside.

I'm a little afraid of my router, it is a large, heavy and powerful tool. I actually have two of these, but the other one is mounted in the router table and is much less intimidating when you use it that way. I think I will make some little frames to help me keep it parallel to the cutting surface and also limit its travel. I find things work out best when I rely on planning as much as possible and skill as little as possible.

I'm a little afraid of my router, it is a large, heavy and powerful tool. I actually have two of these, but the other one is mounted in the router table and is much less intimidating when you use it that way. I think I will make some little frames to help me keep it parallel to the cutting surface and also limit its travel. I find things work out best when I rely on planning as much as possible and skill as little as possible.
Friday, March 4, 2016
Almost Ready To Butt-Strap
The rain just keeps coming in Seattle. I did manage to spend a few hours in the boat shed today. I got the keel mostly faired out. I had to stop to glue on one last piece. I also added the last bits of superstructure needed at the bow. Here is a pic of the bow.

Supposedly the weather should improve this weekend. I hope so, because I need it to be dry to cut plywood for butt straps and planking blanks. Next trip out to the boat shed will be to finish the keel fairing, and to start cutting reliefs for butt straps.

Supposedly the weather should improve this weekend. I hope so, because I need it to be dry to cut plywood for butt straps and planking blanks. Next trip out to the boat shed will be to finish the keel fairing, and to start cutting reliefs for butt straps.
Thursday, March 3, 2016
Life In The Way Of Boat-Building And Planning How To Plank
I didn't spend any time on the boat yesterday and won't be able to today either. Nothing spectacular going on, just need to take care of house and kid stuff. I did however put down how I'm planning to go about installing the planking. This figure assumes that all the surfaces are faired including the keel, which will be faired using a gimp as a guide.

For the bow wall plank I'm going to let it overlap the shear and the stem, to be match trimmed after installation. Same with all planking at the shears and transom. If all this works then the only weird joining left is the keel filler aft of BH3. Functionally I'm going to try to get this all done using the polymer brad nailer, but will have screws and driver at hand if needed.

For the bow wall plank I'm going to let it overlap the shear and the stem, to be match trimmed after installation. Same with all planking at the shears and transom. If all this works then the only weird joining left is the keel filler aft of BH3. Functionally I'm going to try to get this all done using the polymer brad nailer, but will have screws and driver at hand if needed.
Tuesday, March 1, 2016
Keel Installed
This took longer than I thought, Just more detailed than I was thinking. I cut the inside taper at the end of the keel, glued on the inside keel piece aft of BH3 and then bonded the whole thing down. The Hitachi sander has been great and it works as a weight too.


Burning The Bridge Behind Me
"Once you get started on a thing like this, if you pull out, you are letting down the you who got you that far," -Robin Knox-Johnston
Knox-Johnston was first to solo circumnavigate, nonstop in 1968.
Knox-Johnston was first to solo circumnavigate, nonstop in 1968.
Keel Shims And Planning to Plan
I cut the keel cut outs too deep in the bulkheads, I did not account for having to have keel material available to overlap with the garboards. I epoxied, and polymer brad nailed shims to bring the keel to where I can get the garboards installed, and have the keel lie fair. Not much work, but still costs a day to let the epoxy cure. He is a picture.

The other thing to report is that I'm closing in on a plan that I feel good about for applying the planking. I will make some sketches and try to articulate the plan in an upcoming post. I think this will be a good thing to do to insure that I understand my own plan.
It's raining pretty steadily now so I won't be doing much cutting. I'll likely just get the keel installed and get back to planking planning.
Subscribe to:
Posts (Atom)